ルータ2台への基本設定
RouterAとRouterBで操作
もう1台のルータを使用したs0インターフェイスの基本設定
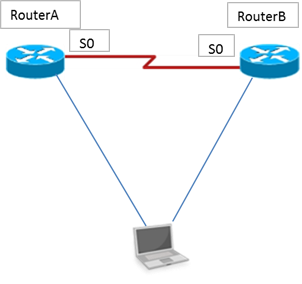
ここからは2つのルータを使用した設定にはいります。
もう一方のルータにつながれているCOMポートを選択して設定画面を表示させましょう。
2台目のルータへのホスト名と、E0インターフェイスのIPアドレス192.168.3.1 255.255.255.0の設定及びインターフェイスの有効化を行います。
Router# config terminal
Router(config)# hostname RouterB
RouterB(config)# interface e 0
RouterB(config-if)# ip address 192.168.3.1 255.255.255.0
RouterB(config-if)# no shut
RouterB(config-if)# end
RouterB#
show interface e 0を行って、
Ethernet0 is up, line protocol is up
となっていることを確かめてみましょう。
RouterBのs0インターフェイスの確認
RouterBのs0インターフェイスのDCEかDTEかの確認を行います。
RouterBにおいて先ほどのセクションと同じように次の入力します。
RouterB# show controllers s 0
最初に示したネットワーク構成図の通りであれば「~DCE cable」と表示されます。
RouterBのs0インターフェイスはDCEになります。
RouterBのS0インターフェイスの有効化
RouterBのS0インターフェイスにIPアドレス192.168.2.2 255.255.255.0の設定とそのインターフェイスの有効化をします。
RouterB# config terminal
RouterB(config)# interface s 0
RouterB(config-if)# ip address 192.168.2.2 255.255.255.0
RouterB(config-if)# no shut
RouterB(config-if)# end
RouterB#
show interface s0を行って、
Serial0 is up, line protocol is down
となっていることを確認します。
対抗ルータのRouterAのS0インターフェイスはアップしているので物理層はupしていますがまだクロックレートは設定してませんのでデータリンク層のほうはダウンしたままの状態になっています。
クロックレートと帯域幅の設定
今度はRouterBのS0インターフェイスに64Kbpsのクロック速度と64Kbpsの帯域幅の設定をします。
次のように入力します。
RouterB# config termianl
RouterB(config)# interface s 0
RouterB(config-if)# clock rate 64000
RouterB(config-if)# bandwidth 64
RouterB(config-if)# end
RouterB#
show interface s 0を入力して 、
Serial0 is up, line protocol is up
となっていることを確認したのちデータリンク層がUPしたことを確認してみましょう。
クロックレートを設定することによって可能になります。
またRouterAでもshow interface s 0を行って同じくUPしていることを確認してみましょう。
S0インターフェイスのカプセル化タイプの確認
次のように入力して「Encapsulation HDLC」になっていることを確認してみましょう。
RouterA# show interface s 0
RouterB# show interface s 0
使用しているルータがCiscoの場合、同期シリアルインターフェイスのデフォルトのカプセル化タイプはHDLCになります。
カプセル化タイプのPPPへの変更
RouterB# config terminal
RouterB(config)# interface s 0
RouterB(config-if)# encapsulation ppp
RouterB(config-if)# end
RouterB#
RouterAのS0インターフェイスのカプセル化はHDLCのままなのでRouterAとRouterBのカプセル化は異なるのでデータリンク層がアップしないことになります。
つまりshow interface s 0コマンドを実行した場合、カプセル化は、
Encapsulation PPP
となっていますが、一方で、
Serial0 is up, line protocol is down
となります。
ここでRouterBのS0インターフェイスのカプセル化をPPPからHDCLに戻してみましょう。
RouterB# config terminal
RouterB(config)# interface s 0
RouterB(config-if)# encapsulation hdlc
RouterB(config-if)# end
show interface s 0を実行して、
Encapsulation HCLC
Serial0 is up, line protocol is up
となっていることを確認します。
最後にRouterAとRouterBの設定情報を保存せずにし、以下のようにreloadさせないようにします。
RouterA# reload
System configuration has been modified. Save?[yes/no]: no
Proceed with reload? [confirm] (Enterキー)
RouterB# reload
System configuration has been modified. Save?[yes/no]: no
Proceed with reload? [confirm] (Enterキー)
-
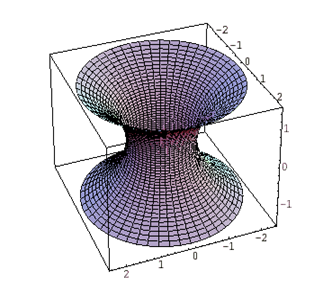
微分方程式いろいろTOPページLaTeXコード
続きを読む
-
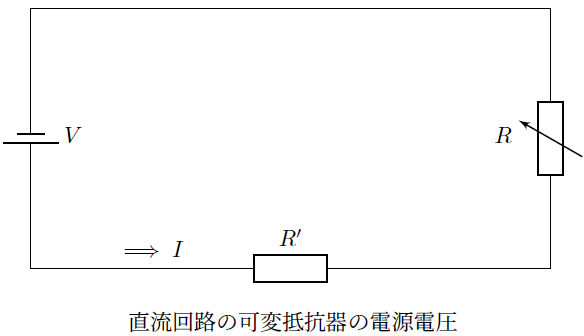
可変抵抗器の直列回路
続きを読む
-

Cisco Packet Tracer
続きを読む
-
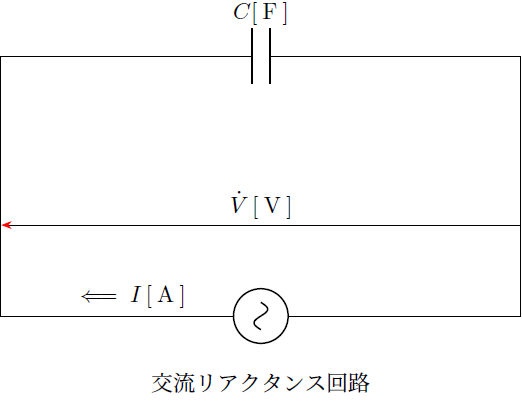
交流回路
続きを読む
-
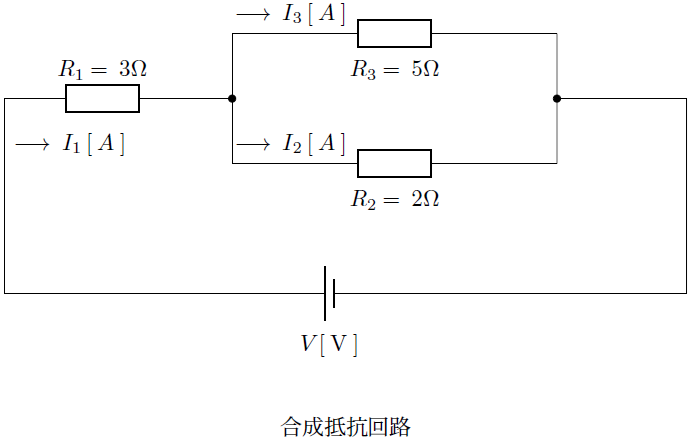
直流回路の合成抵抗
続きを読む
-
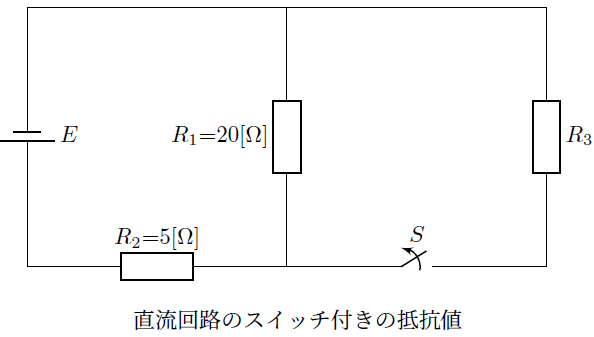
スイッチ付き回路素子の抵抗値
続きを読む